Welcome

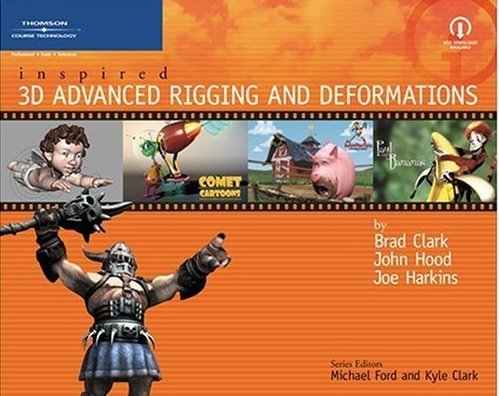
Welcome to the Inspired 3d Advanced Rigging and Deformations blog.

Readers can view the latest errata here
:ERRATA:

And of course can download the book files and errata doc at the publisher website at the link below.
:PUBLISHER WEBSITE DOWNLOADS : (link updated)
note the publisher has changed the site and the download paths mentioned in the book are no longer correct.

I realized that there was not a table of contents available for the book so I have uploaded a .PDF for any one wanting to know what we cover in detail.
:BOOK TABLE OF CONTENTS:


________________________________________________________________________________________________________________________________________________

________________________________________________________________________________________________________________________________________________

________________________________________________________________________________________________________________________________________________

Wednesday

LINK: Dog leg rig and others - inspired by our inspired rigging book

I love finding links to people getting use or being inspired by our rigging book.

Here is a nice tutorial on useing the Maya spring IK with an automatic lower leg flex control.

"Dog Hind Leg Tutorial
By, Tyler Thornock

This tutorial will help you setup a dog/animal's hind leg with a single control to make it easier for the animator to move. This basically artificially sets up a spring ik. So if you have Maya 7, you may want to use it, though this setup does give you more control in the end. This setup may be confusing for some, but the stuff you learn can be applied to many other areas.

Well, the first part of this tutorial is "borrowed" from the Inspired 3D Advanced Rigging and Deformations book, however the book does not setup the rotation of the second part of the leg to be driven automatically which is a pain because the animator would have to rotate it appropriately every time they move the leg. With this setup, the animator can control the rotation or leave it automatic, unlike using a spring ik."

http://www.charactersetup.com/tutorial_dogleg.html


And here is another site with a spine rig tutorial, a reader of the book, taking ideas from it and expanding on them and then sharing it with the world. I just wanted to share the links to their sites and say thank you for giving back to the community.

"
By
David True

Maya Stretchy Spine

The objective of this tutorial is to create a Spine Chain that will stretch and Give you warning if stretch too far or Squash too much."

http://www.darksuit.com/tutorials/StretchSpine.html

Thursday

LINK: Maya Wiki

I found this link again to the Maya Wiki on rigging.
There are some good tips on rigging and also a nice list of Mel and Expressions tips.

I find it a good quick reference to keep around.

Monday

INTERVIEW: Liam Kemp


We have a great interview with the artist behind the new short film "The Normals" . Liam has created an amazing cast of very interesting and realistic characters all on his own and he is speaking with us about his process and his approach to rigging such visually interesting characters.

Thanks again to Liam for taking the time to speak with us and sharing some rigging and technical advice for creating these characters.

Thursday

BOOK: Chapter 6- Rigging Reference -Mechanical rigging

In our book we did not have time or space to talk much about mechanical rigging but we did talk about how to find reference and how to think about rigging up non organic characters.

Here is the excerpt from the book:
So far we have been talking about finding references for organic or living characters and the need for proper joint placement for deformations. We have
not discussed the topic of mechanical rigging and the slight differences that you might deal with when mapping out a robotic or mechanical character.
The same ideas about finding real references for the kind of mechanical joints you will be setting up apply as they do for organic characters. However,
mechanical objects have engineered systems that need to work together and feel like they have a reason to exist. The gears, pistons, or cables need to feel
like they work, are controlling the object, and have a purpose for being where they are on a robot or vehicle. It is up to the Character TD to work out
mechanical systems that animate well, but at the same time keep the animators from having to rotate and hand keyframe all the mechanical bits in the asset.
Take, for example, a robotic suit used to move heavy objects found in so many science fiction movies. If you have to rig up this kind of heavy equipment,
then real construction equipment provides a great reference for how your model parts rotate and pivot, as well as how tightly they are attached or how they
interact as part of the whole. And construction equipment should be easy enough to find. In a big city, you might look at cranes or fork lifts. Even in the
country, a tractor would server as a good reference. Any equipment that is large enough to demonstrate the working relationship between heavy moving
parts should suffice.

The reason I am posting this is because I was reading an article at VFXWorld on the golden army characters in the Hellboy II and found a quote that fight right in with the paragraph above.

"The rig that we animated with was pretty complex; not like a human rig. There were a lot of specific, machine-like movements required to get it to look robotic and able to move well enough to get the performance that Guillermo wanted." Fortunately, Davis was able to find some inspiration on his morning journey to work at Double Negative's studios in the Soho section of London. "It's across from Chinatown, and luckily they were tearing the roads up there, so on the way to work I could watch the big machines. They had a lot of high-tension, stiff joints. When they made a sudden stop, I could see how the force resolved itself within the machine."

The DNeg animators also looked at references on robotic arms, noticing how when they stop after completing a movement, there's a bit of oscillation as it comes to a stop. "We animated a lot with FK -- forward kinematics -- and not inverse kinematics," explains Davis. "IK would tend to give a lot of movement in the elbow, like a puppet, which makes the arm look a little weaker."

© 1996 - 2008 AWN, Inc. All rights reserved.

It was a very small part of the book but I did not want the information to be overlooked.

Added bonus:
The Crazy Elevator rig is a complicated expression to create an automated elevator for The Red Star game environment. Tre Z did the model and I, with some math help, got it working 99% automatically, with an extra layer for keying the start and end. The artist could just move the elevator shaft and it moved the pulleys, rotated gears and was a quick way to add some life to the environment. Teaching some basic rigging and tech work to game environment modelers can take the workload off of animatoin and rigging and at the same time create a much more interactive world.

Watch: Crazy Elevator rig movie

Saturday

TIP: Skin control/muscle under skin and Cartoon silhouette control all from one idea!

Update: I wanted to mention a few notes on this rigging experiment and expand on my notes a bit more for anyone who has looked in to using this method. 
There are two things to watch out for, one is that if you try to rotate a character the rebuild curve node code can't rotate the rebuilt curve as the component cvs rotate and it will cause shearing.  The workaround for this is to create strips and do rebuild surface instead of curves, same method just with surface, it works great.


Or create a local , no moving version of the rig fixes that are then fed in to the final rig as a blendshape. This lets the curves be used more in a shaping control mode vs. skin fix.  I realized this was not clear in the original post and I had thought the bug was a diffrent issue at first.


Here is a small trick that has lots of potential to help improve deformations with out a lot of extra work.

Influence object rebuilt surface technique: (updated)
This is not a replacement for muscle simulation but it is in my experience much faster to setup and visually looks better than other solutions I tried, advantages include topology independent, the surface can be mirrored and the weights can be also using built in Maya tools (2008 and up) and for speed of playback they are easy to turn off.
  1. Build a nurbs surface; either using extracted character mesh curves with the "edit-convert-edge to polygon"  or edit a nurbs surface (divided plane) to following shape of character mesh.
  2. Rebuild the surfaces with history, the result surface will be used as an influence object eventually.
  3. The Base (original surface) gets skinned to the characters skeleton. Do this with weights->copy weights from the skin mesh your adding this influence object to have it mach what the skin is doing all ready.
  4. This surface can be offset/translated away from the outside of the mesh so that it helps to keep the skin volume along with allowing us to see the separate control surface and the rebuilt influence surface.
    Since it is offset away from the base surface you before you add it as an influence it will not cause an offset deformation in the mesh.
  5. The rebuilt surface becomes the character mesh influence object (using components, so make sure you turn on "use components" on the skin cluster and check your "add influence object- settings").
  6. The history of the surface (spans/curve type/etc) can be SDK driven so that the skinmesh is looser or tighter to the original shape, once weights are painted to it. Or you can just set it and leave it static.
  7. This has many great possible applications. The base skinned mesh can be also clustered or have additional deformation controls layered so that you can reshape/sculpt the silhouette of the mesh or produce fake muscle slidebuldge.
  8. For an added layer you can can directly transform the rebuilt surface as another layer of control over the effect.
Examples:
  • I used surfaces that were drawn around the top of the shoulder , base of neck down over the shoulder muscle and also from shoulder down the back to help with clavicle deformations. This can be run down the belly of the character to help with skin compression when leaning forward and during twisting. At the hips running extracted surface helpers along the front and side of the leg to help with complex folding/creasing and other hip related problems makes life much easier since the low rez rebuilt surface stays evenly spaced you avoid deep pinching valleys in the mesh.
  • You can run the surfaces along the surface in the way that a muscle would lay or you can just fallow the basic from in a strait line in areas that are pinching like the crease at the shoulder/clav and the hip when you lift the leg strait up or out to the side in the splits, helps keep the skin from just pinching in..it lets the skin compress and stretch instead and it uses the skinning info all ready there to follow along so you want to get it as good as you can to start with and instead of helper joints with complex driving situations or pose spaced def you can use this as a helper surface instead.
  • Time saved 4 days trying for fixing issues with normal methods(cluster/helper joints/lattice/skin weights) vs. 2 hours with the Influence object rebuilt surfaces technique
Sample video showing curve layout and the difference between the base curve that matches the mesh and the rebuilt curve that is only like 5 points and how it is offset.


Sunday

TIP: John's Random MEL Tips

This is more of an expression tip, but, expressions are MEL, aren't they?

Actually, they are, and they aren't. Mostly, they aren't, and that is the point of this post. Expressions are very powerful tools, and they can be used to great effect, especially when something needs a quick turn-around. One must take care, however, to construct expressions without pitfalls.

The basic rule of an expression is, don't call MEL functions to edit attribute values. This is not to say you can't, but it is to say that you shouldn't. There are some good reasons to avoid them. Let's look at one case.

In Maya, create a locator, 'locator1'. Select the translateX parameter in the Channel Box. From the context menu, select 'Expressions'. In the Expression Editor, set the following:

setAttr locator1.tx 1;

Press the 'Create' button. You will see locator1's translateX parameter set to one. What else do you notice?

The observant among you will notice that the locator's translateX channel does not turn purple, and if you have ever set an expression, you should know that the channel turns purple when an expression controls it. If you select the locator1 translateY and create this expression:

locator1.ty = 1;

you will notice the translateY channel turns purple.

Why is this important? Well, MEL commands like setAttr bypass Maya's Dependency Graph evaluation. Maya keeps track of the relationships between nodes by tracking the connections between node attributes. In this case, Maya knows that locator1.ty is 'connected' to something, even though the connection is implicit in the expression. If you look at locator1 in the Connection Editor, you will see that Maya recognizes the connection - this is a good thing.

So, MEL commands bypass the Dependency Graph, and this can cause no end of problems. By setting attrs in an expression, it can be difficult for Maya or another human to figure out where the heck a value is getting changed. It can also lead to undefined behavior within playback or rendering.

So what works well within an expression? To answer that, I will illustrate with two expressions - one 'wrong' one, and one 'right' one. Both of these expressions will do the same thing: given input attributes locator1.ty and locator2.ty, it will set locator3.ty to the distance between the first two attributes.

First, the wrong one:

float $ty1 = `getAttr locator1.ty`;
float $ty2 = `getAttr locator2.ty`;
float $result = pow(pow($ty1, 2) + pow($ty2, 2), .5);
setAttr locator3.ty $result;


I used some variables to keep it readable. If you create this expression on locator3, you will notice that it will not work unless the time slider is updated. Also, in the Connection Editor, you will see that the connection information is not obvious or complete.

Here is the 'right' one:

locator3.translateY = pow(pow(locator1.translateY, 2) + pow(locator2.translateY, 2), .5)

If you replace the previous expression with this one, you will notice that manipulating the locators forces an immediate update. You will also notice that the Connection Editor displays more complete and descriptive connection info.

So, should you never, ever, ever use MEL commands in expressions? Yes. Well, actually, it is tricky. As you can see, the 'right' expression used the math command 'pow' - and that's MEL. What you will notice, though, is that the attribute assignment mechanism is used - instead of variables, try to use the node.attribute syntax and assign values with '='.

There will be some times when you have no choice but to write MEL-heavy expressions. I had to do this for some dynamics simulations due to some bugs in Maya's particle system. But they should always be a last resort. Don't take the easy way out - use the expression engine to your best advantage.

LINK: Manipulation Switching-

Now that the book has a blog I figured it was a great place to post nice things like this.

I shared some of the book code over on a cgtalk thread and then saw this post,
djx blog � has some nice rigging .MEL scripts and he created an auto script out rigging book code I posted at cg talk. So stop over and check it out and say thanks.

the script is called djSwitchManipOnSelection.mel

Brad

Wednesday

New blog for Inspired 3d Advanced Riggig and Deformations

Just setting up the site right now, content to come shortly. Sadly www.creatureTD.com was overrun by spam bots and I am working on reposting the book content from the website here in the book blog.

Brad