Welcome

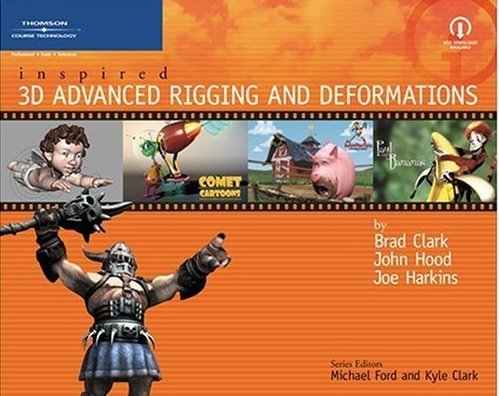
Welcome to the Inspired 3d Advanced Rigging and Deformations blog.

Readers can view the latest errata here
:ERRATA:

And of course can download the book files and errata doc at the publisher website at the link below.
:PUBLISHER WEBSITE DOWNLOADS : (link updated)
note the publisher has changed the site and the download paths mentioned in the book are no longer correct.

I realized that there was not a table of contents available for the book so I have uploaded a .PDF for any one wanting to know what we cover in detail.
:BOOK TABLE OF CONTENTS:


________________________________________________________________________________________________________________________________________________

________________________________________________________________________________________________________________________________________________

________________________________________________________________________________________________________________________________________________

Tuesday

TIP: tentacle rigs

UPDATE: This post is one of the most accessed on the blog. I wanted to add a link for people to a Maya tentacle rig tutorial that Joe Harkins did for Computer Arts. There is a PDF and sample files to download.


I find lots of posts on people wanting to know how to rig up a tentacle and while there are some ways that can work very well, some can get very complicated quickly both for the TD and the Animator.

Depending on the needs of the shot, I am posting a file and a few pictures and videos of some simple but very solid tentacle rigs that I hope help people out.
  1. Basic idea- FK Tentacle with geo skinned to it (animated as offsets from IK rig)
  2. FK joints parented under spline ik animation skeleton FK tip extends out past IK ctrl for grabbing or curl/drag etc.
  3. IK rig is a spline IK that gives you fast poseing and animation then FK offsets let you overlap and add noise in to the key poses created from the spline ik anim. Helps keep the keyframes for the poses and timeing clean because they stay on the IK.
How you interface the controls is really up to you and the animators. In the Maya example I just used selection handles because it was a quick file for demo, in the Max file it has control objects to animate with and was used by several people. This rig was used where I needed lots of control over timing and poses for the game level, but I wanted to be able to layer in extra movement with out breaking game play, and this rig allowed for that.


DOWNLOAD: Maya and Max Tentacle Examples


Here is an example of the max tentacle rig in action

Sunday

New Project: RiggingDojo.com the online school for character techinical artists

So this is a bit of an advertising post, if you don't want to read it turn away now. Don't worry it will not be the end of content on this blog or support for the book or ads on the side bar.

...Still here? thank you.

So I have decided to co-found a new online education project especially for character artists.
Called Rigging Dojo.

http://www.riggingdojo.com/

You can find out more at the site, so I won't bore you with that.

I did want to talk a bit about how this all happened. First was that last few years two of my friends and I separately were all talking but not with each other about having a really hard time finding good character technical artists and talk of training and mentoring and schools came up...well I said "hey I we are all talking about this separately, lets join forces" and then here we are.

And to be fair, as we were working on the details a few things happened. One some other amazingly talented people had the same idea and http://www.td-college.com/ was born and kind of kicked the wind out of us for a bit. After talking it over we re focused on what our original goal was; Wanting help fix the disconnect happening for people that read the rigging books and post questions on forums and watching all the video training but were still struggling, and create a place for them to get real guidance and production based training no matter what their experience level. The other issue was the huge number of people needing help learning MotionBuilder and dealing with pipeline and character rigging issues that adding motion capture to your workflow brings.

So if your a reader of the Inspired rigging books or have watched all the amazing Jason Schleifer masterclasses or your working in production all ready but want to learn more or are in school learning modeling and want to see it ready to be brought to life (yes we are a bit like DR. Frankenstein) or are struggling with motion capture, then come over to the Rigging Dojo site and see if it is right for you and let us know what you think.

Make sure you check out the other options also.
Like the guys over at http://animationrigs.com/
and of course http://www.td-college.com/
and http://www.digitaltutors.com/
since I know not every one has the same budget, needs or learning styles.

Thank you for your time and never stop learning,
Brad Clark

Thursday

LINK: Cartoon rigging in MotionBuilder

Setup ave_cartoon on Vimeo

I don't know this person but the rigging on the bird is great and he has some other MotionBuilder tutorials.

Really nice to see some non-mocap work being done with Mobu.

Monday

Free Chapter: Chapter 8 Two Hand props (re-written)

It was clear after reading over this chapter that there were other issues than the first errata post for chapter 8 were going to be able to address.

To address this we decided to re-write it,test it and then added two extra Maya files showing the end results as well as included a new .MEL script that is a rough automation of the prop rigging for our character.

You can download the .ZIP file that includes a .PDF of the updated chapter and the files needed to complete the chapter.

Download: Chapter 8 Two hand prop re-write .ZIP

Thank you to our readers and apologies that these issues were not found before the printing of the book.

The Authors.

Sunday

Link: Wrist twist for animators and file referenceing

My friend Kiel Figgins has posted a detailed writeup on wrist twist and the pros of keeping it simple. Always good advice.

http://www.3dfiggins.com/writeups/forearmTwist/


*
He also has a nice explination on file referencing and useing it to your productions advantage. Check it out.

http://www.3dfiggins.com/writeups/mayaReference/

Enjoy.
Brad

Wednesday

Errata: new update for the two handed prop tutorial

In an effort to fully support our readers I am posting this update on the main blog and the main google errta doc has been updated as well.


###################################

Chapter 8: page 164 step 7:
change

Select the “staffCtrl” node and group it with Ctrl+g.
To

Select the “
staff_Ctrl node and group it with Ctrl+g.
Chapter 8: page 165 step 12:
change
Group this node and rename it “staff_r_hand_offset_attach.”
To

Group this node and rename it
staff_r_hand_attach.”
(this change is to the name only. so that step 13 makes sense.)
Your really doing the same thing as you did in the knife tutorial but
adding an extra target and switch for the left hand to
be stuck on to the spear...the concepts are the same)

*also note that once the rig is done you can clean up the visual
hierarchy like you did at the end of the knife rig.

Friday

Interstellar Marines | Setting up the shoulder area of the marine - Part 1

Interstellar Marines | Setting up the shoulder area of the marine - Part 1

I am posting this for a few reasons-

1. I am always happy to see people talking about the importance of early communication between the modeling, rigging and animation dept. when starting on a character (see my talk from concept art.org
2. It talks about a few methods of working on the character that I covered my book, I am not sure if Sune (http://www.sunekempf.com/blog/) has read my book but it is nice to see we share some of the same views on rigging process.
3. ** T -pose??? it is a great example of a clear presentation of what and why of making a good default pose for rigging a realistic character. This seems to come up very often as a question so I am glad I can point people to another resource for people that have not read the Inspired 3d rigging books.


This is just part 1 and I look forward to more posts.

Brad Clark

Wednesday

Errata: new update for the spine rig- chapter 7

First a huge thanks to reader "J" for find this problem and letting us know.

The errata doc is current and I am posting the changes here as just the update.
I had changed the way I rigged the spine for the example file and simply forgot to update and clean up this part of the chapter.

Here is the fix to match the down loadable final character.

Chapter 7: page 134, paragraph 4, step 2:
change “”
Auto Parent Curve off and Number of spans set to 2.”” to Auto Parent Curve off and Number of spans set to 3.

Chapter 7: page 135,

step 5:
change-
ignore/delete

step 6:
change ”
Name the curve “ctrl_chest” and zero out its translation. Then parent the control curve shape node under the “ctrl_chest.

To Rename the joint "ctrl_spineChest" to "ctrl_chest". Then parent the control curve shape node under the "ctrl_chest".

step 8-
change “orient-constrain “spineChest” to “ctrl_chest.” to “orient-constrain "bn_spineChest" to "ctrl_chest"

Chapter 7: page 136,

Step 15. - Because our FK spine controls are the parent of the upper "ctrl_chest" you are always in a mixed state of IK and FK, when the ctrl is zero, you can FK rotate the spine joints and the "ctrl_chest" and the rig is in FK mode. but at any taime you can choose to translate the "ctrl_chest" and are now in IK mode for the back, if you want pure FK gain you can zero the "ctrl_chest" and your blended back to pure fk.

Step -16 ignore/delete


Sunday

Workshop: ConceptArt.org Dallas Workshop: Reverie

ConceptArti.org Dallas Workshop

**UPDATE**
Posted some links and info from my talk (click here:)

I am (Brad) going to be speaking at the Reverie concept art workshop on the 29th, Sunday.

My presentation will be based around some of what I talk about in the early parts of the Inspired book and also around an idea I had early last year after frustrations over production issues.

"Some one needs to talk about workflow, art and design as it applies to moving characters and objects and not just a cool looking still and how these details or lack of them affect the entire project."

So I hope to see some readers at the workshop, it is an amazing experiance to be a part of and I also am looking forward to just getting my creative battries recharged and get some real media time in...mole skin and pocket watercolor set will get dusted off.